Adding New Entity Groups
Go to the CRM component in SiteStacker, click on the Configurations tab, then click on the Entities tab. In the top-left tab, click "Add Entity Group"
Adding New Entities
Go to the CRM Component in SiteStacker, click on the Configurations tab, then click on the Entities tab. Right-click on the Entity Group where you want to add your Entity and select Add Entity.
Check "Is Repeatable" if you would like to store multiple instances of this data set. This is called a "Repeatable Field Set". For example, "Employment History" (Name of Employer, Title, and Dates) should be a repeatable fieldset if you would like to list more than one employment experience. When this setting is checked, all fields will be repeatable. This means that general data points that should be stored more than once should be saved in a general entity. For example, "Are you employed" could be saved in a general entity called General Employment that is not repeatable, while Employer Name, Title, and Dates (which are repeatable) should be stored in a repeatable entity called Employment History.
Adding New Fields
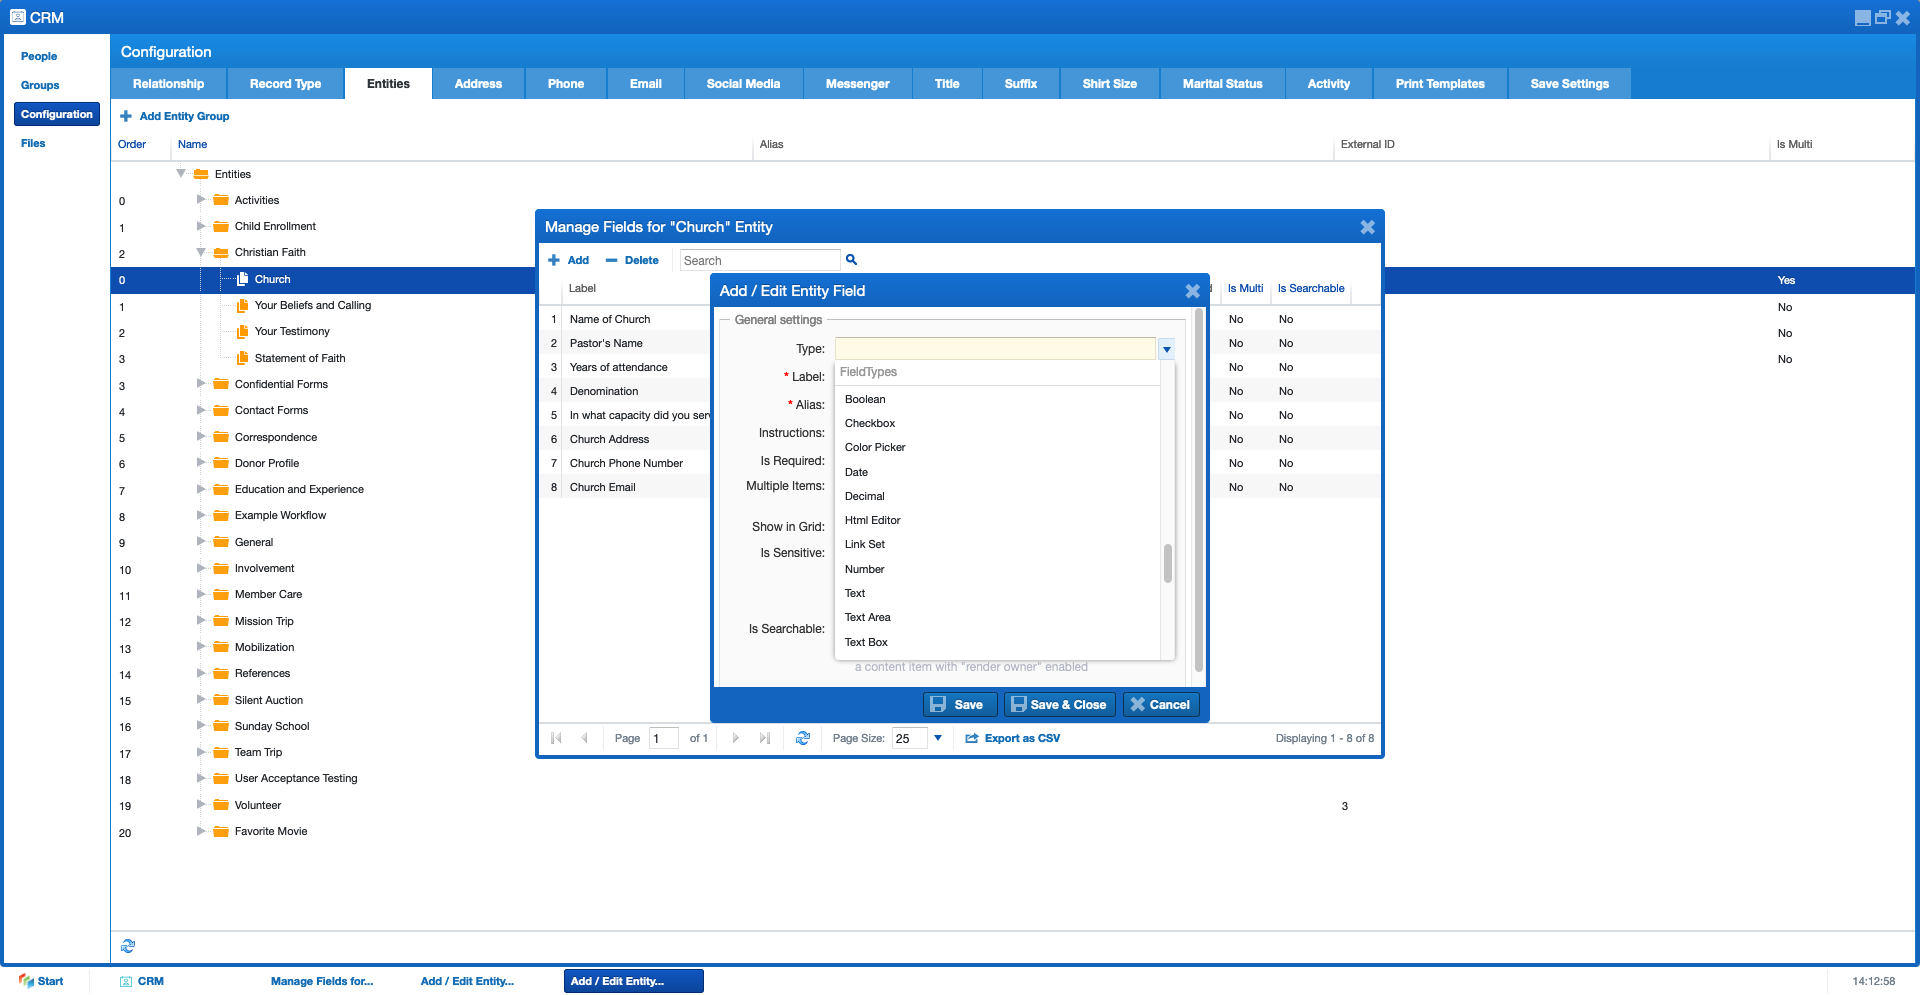
Go to the CRM component in Site Stacker, click on the Configurations tab, then click on the Entities tab. Expand an entity group and then right-click on the Entity where you want to add a field then select "Manage Fields". In the top-left corner of the window, click "Add" and choose your field settings. If you would like to add your new field to a Motion 2 form, you will need to do this separately after adding it to CRM.
Available Field Types
- Text - Single lines of text for short answers
- Text Area - Multiple lines of text
- Datagroups - These are custom dropdowns. They must be configured in the Datagroups component before being added to CRM. A data group should also be used for Yes or No questions.
- Date - Date fields with a date, month, and year format
- Number - Number without decimals
- Decimal - Number with decimals
- TinyMCE Editor - Rich text editor for very long answers such as essay questions that require additional formatting
Notes: Do not use the Boolean field type, as this will default to No if the data point is blank. Do not use Yes No field type, as this is now deprecated.

General Settings
These will be available on all fields, regardless of the field type.
- Type - Choose a field type such as a text field, date field or custom data group
- Label - Choose a label for the field. This will be displayed in CRM and is also the default label in Motion 2 forms
- Alias - An alias will automatically be generated based on your label
- Instructions - Thus configuration is not relevant to CRM fields and should be skipped
- Is Required - Select this if you want this field to be required anything a field in this entity is edited. This is NOT recommended. If you would like to make this field required on a Motion 2 form, you will select this setting in the Motion 2 form, not at this time.
- Multiple Items - Select this if you would like to allow multiple data points saved on this field. For example, if you are configuring a Comment field on a Contact Us page, you would want to enable this setting so that a user can fill out the form more than once without overwriting previous settings. Another example would be on drop-down fields such as "Preferred Length of Service" where you would like to allow the user to choose more than one option.
- Show in Grid - This configuration is not relevant to CRM fields and should be skipped.
- Is Sensitive - This configuration is not relevant to CRM fields and should be skipped.
- Is Searchable - This configuration is not relevant to CRM fields and should be skipped.
Custom Settings
Additional settings may appear based on the type of field you selected
- Display Field - This will default to display the primary field created in the Data Group. You must also choose to display the field as a Combo Box (dropdown), Radio Group (clickable buttons), Checkbox Group (available only for fields that allow multiple items to be chosen), or multi-select Combo Box (available only for fields that allow multiple items to be chosen)
- # Columns - Choose the number of columns that will be used to display drop-down options
- Autoflex - Select "Yes" if you would like the columns to fill the full width of the display area
- Order by - Choose which data group field should determine the sort order
- Order direction - Choose whether the sort order should be ascending or descending
- Group by - For data groups with secondary fields, select a secondary field to group the options by
Modified on Fri, 22 Sep, 2023 at 10:17 AM
Was this article helpful?
That’s Great!
Thank you for your feedback
Sorry! We couldn't be helpful
Thank you for your feedback
Feedback sent
We appreciate your effort and will try to fix the article