Importing Users is for the Admin to assign temporary passwords for these accounts so the user may gain access to the login from the front side to view their Donor dashboard. Before you can import Users, you will need to have the CRM records created first.
Note: Any bold fields you see below are required for the import to run correctly!
Once the CRM records for these users have been imported to SiteStacker, the Admin should:
- Click the 'Import' component.
- Click the 'Documentation' tab.
- Scroll down to check the 'User' checkbox.
- Click 'Download Selected' found on the upper right side of the window.
Reminder: The User is somebody who will be able to log in to your SiteStacker installation, and they will use their Email Address and the Password you generate for them to do so.
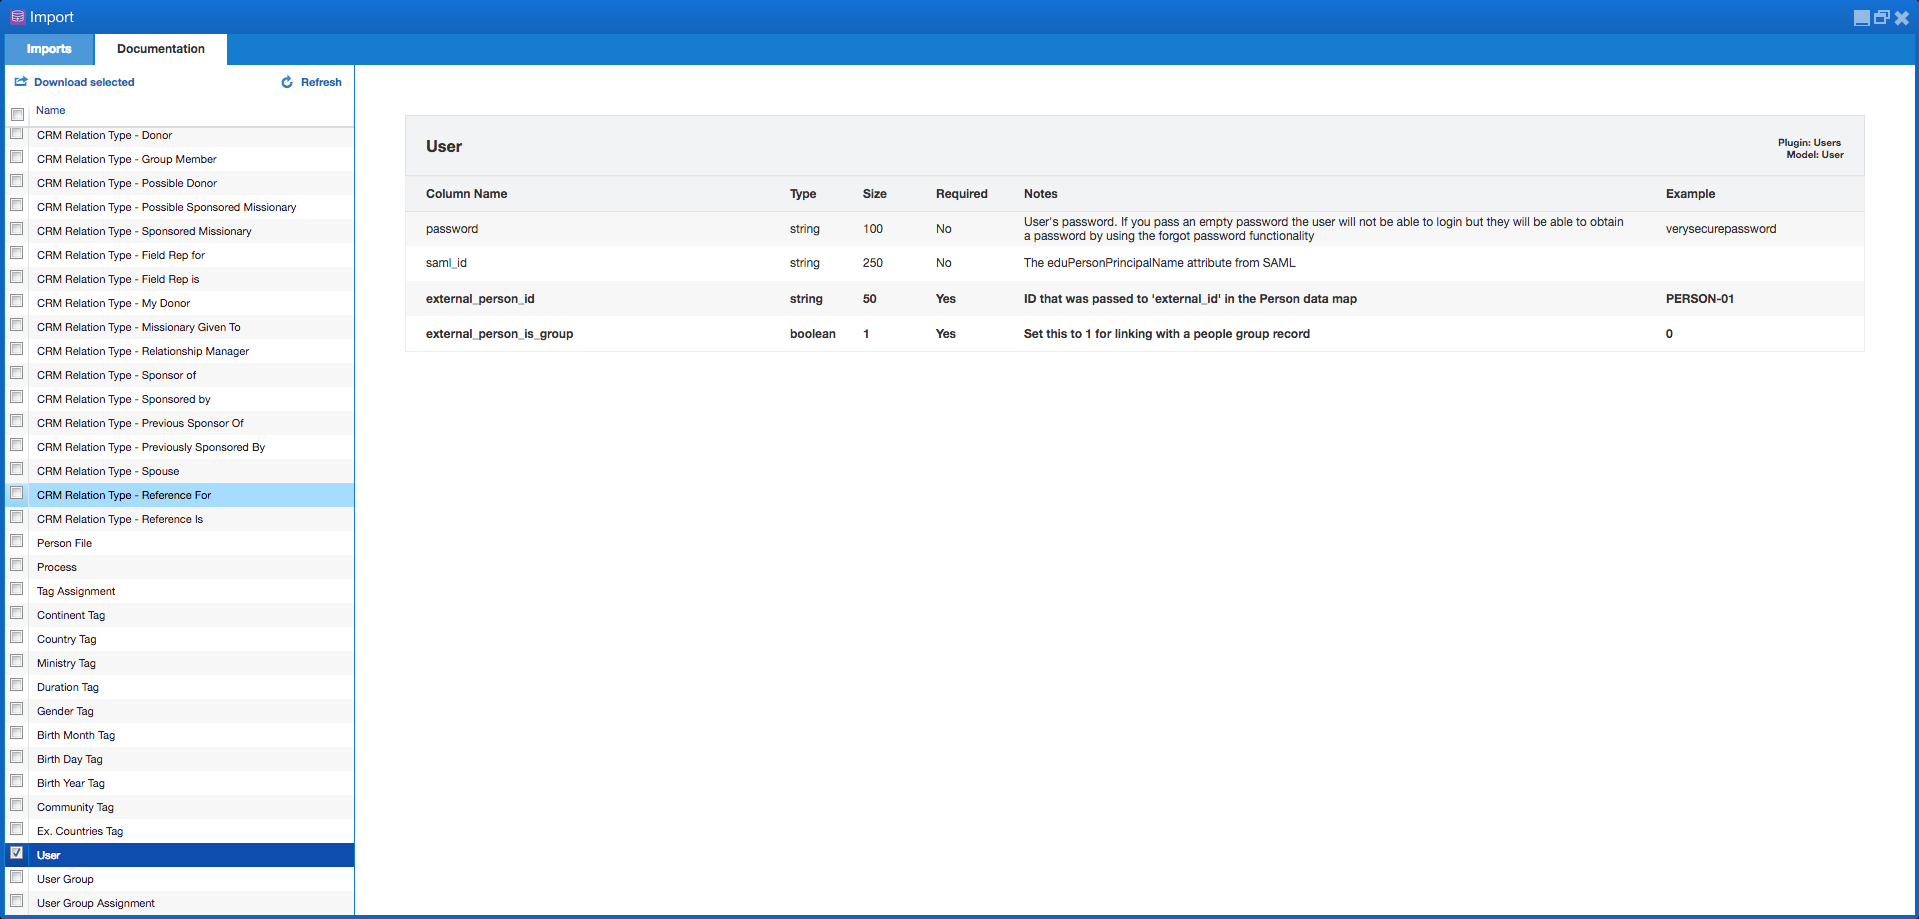
Column Name | Description |
password | User's password. If you pass an empty password the user will not be able to login but they will be able to obtain a password by using the forgot password functionality |
saml_id | The eduPersonPrincipalName attribute from SAML |
external_person_id | ID that was passed to 'external_id' in the Person data map |
external_person_is_group | Set this to 1 for linking with a people group record. 0=No, 1= Yes. |
Next we will go over the User Groups Import
- Click the 'Import' component.
- Click the 'Documentation' tab.
- Scroll down to check the 'User Groups' checkbox.
- Click 'Download Selected' found on the upper right side of the window.

Column Name | Description |
name | Name of the User Group |
external_id | Record's ID from the external data source |
external_parent_id | Record's ID from the external data source. |
_skip_parent | Set this to 1 for skipping parent ID check. 0=No, 1= Yes. |
_skip_callbacks | Set this to 1 for skipping model callbacks. 0=No, 1= Yes. |
Lastly, we will need to import the User Group Assignment
- Click the 'Import' component.
- Click the 'Documentation' tab.
- Scroll down to check the 'User Group Assignment' checkbox.
- Click 'Download Selected' found on the upper right side of the window.

Column Name | Description |
external_person_id | ID that was passed to 'external_id' in the Person data map. |
external_person_is_group | Set this to 1 for linking with a people group record . 0=No, 1= Yes. |
external_group_id | ID that was passed to 'external_id' in the Group data map. |
Modified on Tue, 19 Sep, 2023 at 10:09 AM
Was this article helpful?
That’s Great!
Thank you for your feedback
Sorry! We couldn't be helpful
Thank you for your feedback
Feedback sent
We appreciate your effort and will try to fix the article